UPDATE: 01/24/2014 – The team at Offensive Security have put out a blog post announcing an official Kali AMI on the amazon marketplace. The AMI is free. Here’s the Offsec blog.
I recently decided I wanted a quick and simple way to spin up Kali instances on the Internet, and chose Amazon Web Services (AWS) for the task. Cursory Internet searches did not reveal much in the way of tutorials or how-to’s.
There are probably {better, easier, faster} methods to get a Kali instance on AWS, but I wanted to share the method I used along with some “gotchyas” I experienced along the way.
A little birdie tells me that the folks at Offensive Security may be posting official documentation or a blog on this very subject soon. I’ll add that info or a link to it to this post when/if that comes to pass.
My method’s prerequisites
1). Access to VMware vSphere/vCenter 4.0, 4.1, 5.0, or 5.1 (I used vCenter 5.1)
2). A Kali VM (installed on vSphere)
3). AWS account
4). The EC2 VM Import Connector vApp (virtual appliance)
Steps
Step 1
Install Kali as a VM on your VMWare hypervisor. Using the EC2 Connector vApp requires the Linux distro to be x64 so I used the “Kali Linux 1.0.5 64-Bit ISO”. I chose a 20GB hard drive and 1GB RAM when creating the VM. Choose all partitions on a single drive.
Gotchya – Kali Changes
I could not get this process to work with the current kernel Kali was using (3.7). I downgraded to 3.2 (apt-get install linux-image-3.2.0-4-rt-amd64). I know this is probably not the best idea, but I kept getting “incompatible kernel errors” when migrating.
Also, I set the grub timeout to 2 randomly thinking it would boot into the first kernel quickly, rather than timeout, and removed the 3.7 kernel options from grub so that only 3.2 showed up. This could be an issue with the EC2 Connector vApp, I’m not sure. Without these settings I got errors.
Don’t forget to enable sshd on startup, or else you’ll have no way to access the machine once its on AWS.
Step 2
Install the EC2 VM Import Connector vApp on your VMware hypervisor. There is Amazon documentation on installing the vApp here
Gotchya – Time not Sync’d
Make sure the time on the EC2 vApp is correct in relation to the real world. The time is UTC, you can go to the vApp console and log in as root (no password) and set the time. If your time is off it will not login to the AWS API.
Step 3.
Shutdown the Kali VM on the VMware hypervisor. Notice the new tab (Import to EC2) that appears on the right of the VMware tabs after you installed the EC2 connector vApp.

Select your Kali VM in the left hand pane of the hypervisor management console and click the Import to EC2 tab. You will be prompted for your AWS Access ID and Secret key. Amazon docs for that here.
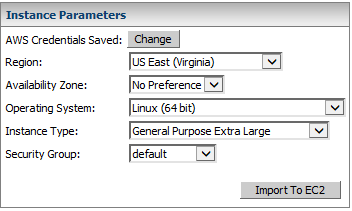
Now select your instance parameters. We are limited to x64 bit Linux, and the instance types we can choose from. We can resize these later, though. However, I chose the lowest of thew two (General Purpose Extra Large = m3.xlarge). The lowest I have been able to resize this to is a c3.large instance (0.150 an hour). More experimentation is needed here.

Now click Import to EC2 and wait for the task to finish.
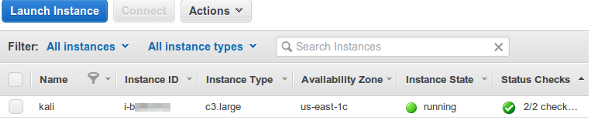
That’s it. You know have an EBS backed instance of Kali running on AWS.

Like I said, you’ll probably want to resize the instance to c3.large, or experiment further to try to get the instance type to a smaller/cheaper instance. Maybe less HD space?